First impressions matter! Especially when it comes to capturing the user’s attention on your website.
According to the Primary Effect Theory, humans tend to recall information presented to them first better than that which is presented later. And when it comes to websites, the Header is the first thing visitors see, making it a critical component of your website! In turn, Footers have the crucial job of providing a cohesive conclusion to your website.
Additionally, a Header and a Footer play a key role in facilitating easy navigation for your WordPress website, ensuring a seamless user experience. So in this article, we will learn how to edit the header and footer of your WordPress Website.
Headers and Footers
Headers and Footers, like the names suggest, refer to the top and bottom sections of a website, respectively.
Although the purposes of Headers and Footers depend on the objectives and design of your website, here are their most common utilizations –
Headers
- Branding – The website’s header section typically contains the elements such as the logo, site title, and tagline of a brand.
- Navigation – It often includes the main navigation menu, allowing users to easily navigate different pages or sections of a website.
- CTA – Headers can also be used to highlight important information or key messages for visitors with a prominent call-to-action button that engages users and directs them to perform desired actions.

Footers
- Additional Navigation and Links – Footers often include secondary navigation menus that provide links to important pages like About Us, Contact, Privacy Policy, or Terms of Service. They can also include links to additional resources, related websites, or social media profiles.
- Copyright and Legal Information – Footers commonly contain copyright statements, disclaimers, and other legal information. This area can also include privacy policy links, terms of use, and other notices.

Although Headers and Footers are important components of a website, it’s the whole website in its entirety that makes the impact! If you’d like some insights on creating an effective website, read ‘How to Create a WordPress Website’.
Edit your WordPress Website’s Header and Footer using the Site Editor
If you wish to only view the header and footer in WordPress while your edit them as opposed to the entire website, there’s a way to do just that!
After opening up the Site Editor, click on ‘Template Parts’.
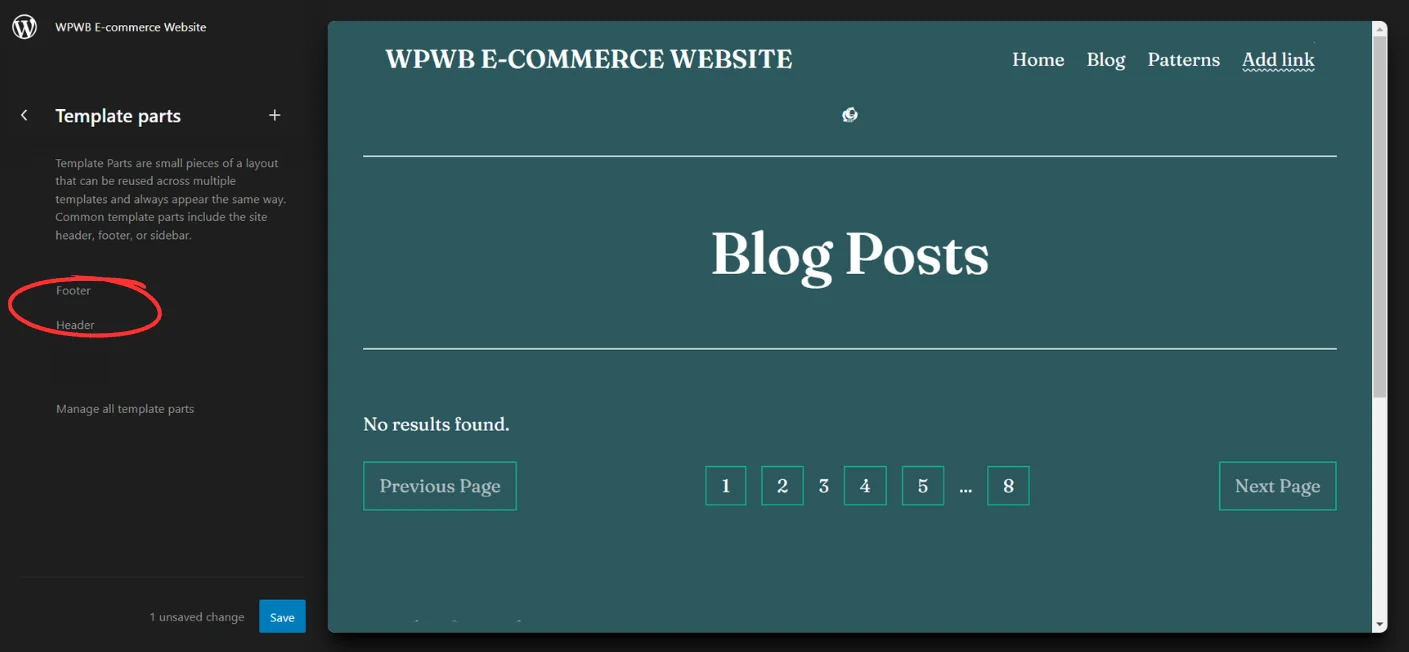
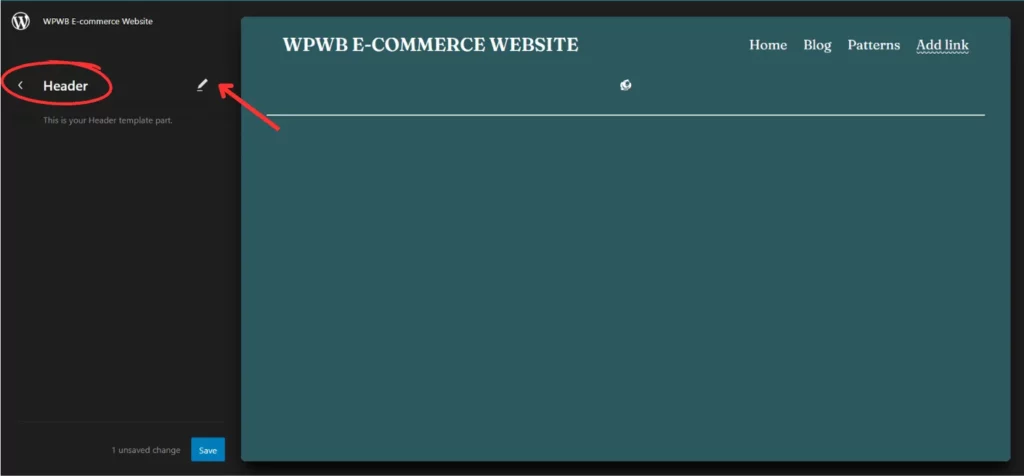
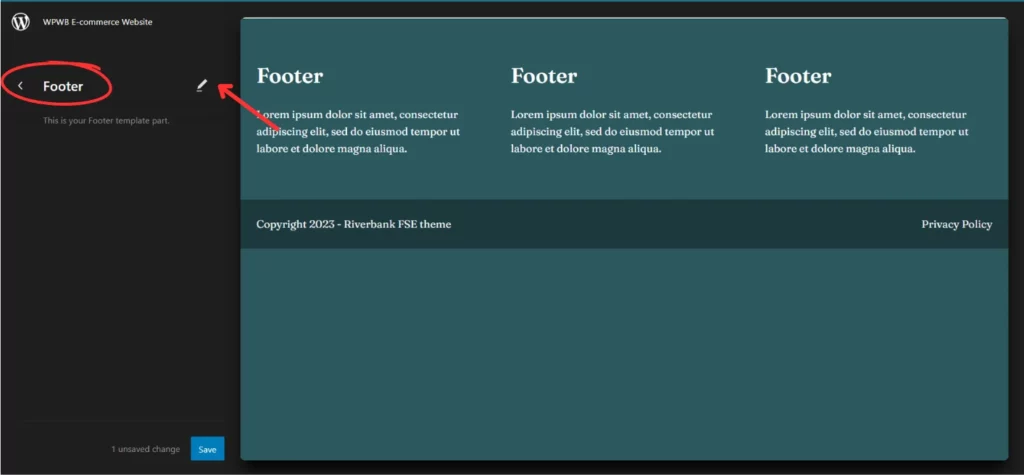
Select the ‘Header’ or ‘Footer’ Option in WordPress and click on the ‘Edit’ icon to view and edit just those sections.
We use WordPress’s Site Editor in this Method, and the process is quite straightforward. Here’s what you need to do –
- Navigate to ‘Appearance’>’Customize’ from the admin panel on your dashboard.

- Select ‘Site Identity’.

Here you can add or modify your ‘Site Title’, its ‘Tagline’ and select a ‘Site Icon’ – which can be the logo of your brand.
- To edit them further, select the ‘Use Site Editor’ option.

- You will see a page like the following. Click anywhere on the page. Upon doing so, you will be able to freely edit your page.

- Click on your Header and edit your text or use the toolbar option to make changes. Use the Block Editor to add any additional elements.

- Next, scroll down to the footer section. Use the above methods to edit your footer.
- If you wish to add any patterns to your header or footer, click on the Block Inserter and select ‘Browse All’.

Under Patterns, select Header or Footer and view a selection of various patterns. Choose one you’d like, and it’ll automatically be added to the area you selected. Then you can further edit it as you please.
If you want to only view the header and footer in WordPress while your edit them as opposed to the entire website, there’s a way to do just that!
After opening up the Site Editor, and click on ‘Template Parts’.
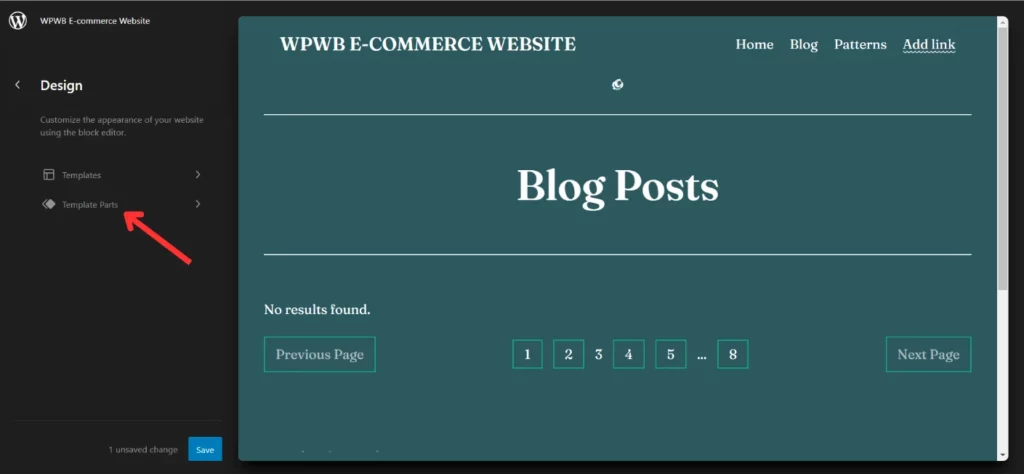
Select the ‘Header’ or ‘Footer’ Option and click on the ‘Edit’ icon to view and edit just those sections.
Edit your WordPress Website’s Header and Footer Manually
In the method, we will manual edit the Header and Footer code.
Connect to your website using an FTP (File Transfer Protocol) client. Once connected, Navigate to the “wp-content/themes” directory.
Step 1: Log in to your WordPress Dashboard and Navigate to ‘Appearance’ > ‘Theme Editor’. This will open the Theme Editor page.
Step 2: From the right-hand side, choose the theme you want to edit the header and footer of from the drop-down menu labeled ‘Select theme to edit’.
Step 3: Locate the ‘header.php’ file in the list of theme files. Click on it to open it in the editor. Modify the HTML, CSS, or PHP code within the file to make changes to the header section. To save your modifications, select the ‘Update File’ button.
Step 5: Similarly, locate the ‘footer.php’ file in the list of theme files. Then, click on it to open it in the editor. Further, modify the HTML, CSS, or PHP code within the file to make changes to the footer section and select the ‘Update File’ button.
Step 6: Visit your website to see the updated header and footer sections. Then, check for any display or functionality issues and make further adjustments if necessary.
Use Plugins to Edit your WordPress Website’s Header and Footer
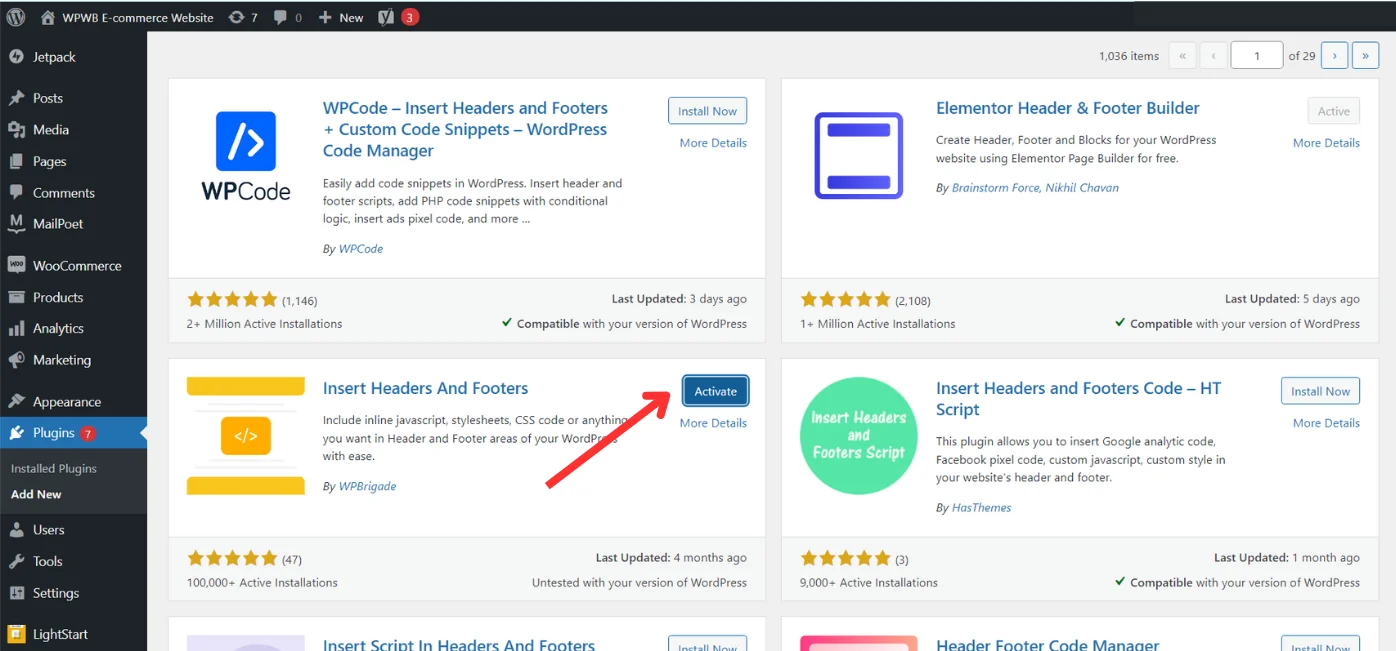
Another method to edit the Header and Footer of your website is with the help of Plugins. There are a variety of plugins to choose from the WordPress theme repository; here are a few you begin with – WP Headers and Footers, Elementor Header and Footer Builder, Insert Scripts in Headers and Footers, and Header Footer Code Manager.
In this article, I will show you how to use the WP Headers and Footers Plugin –
Step 1 – Install and Activate the Plugin.
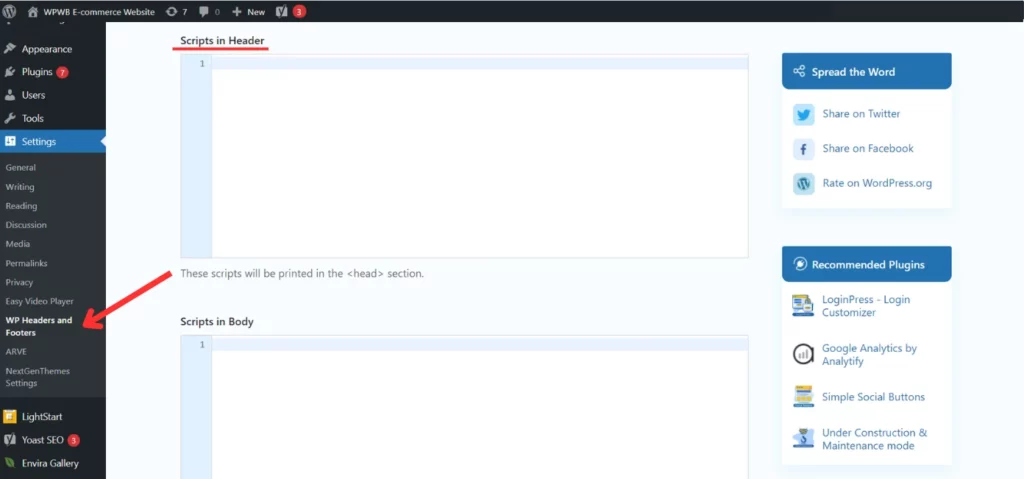
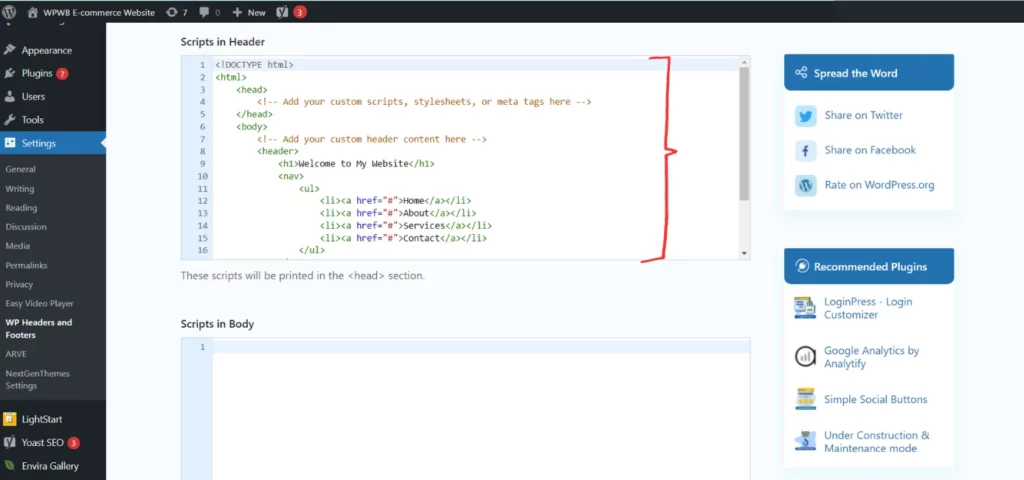
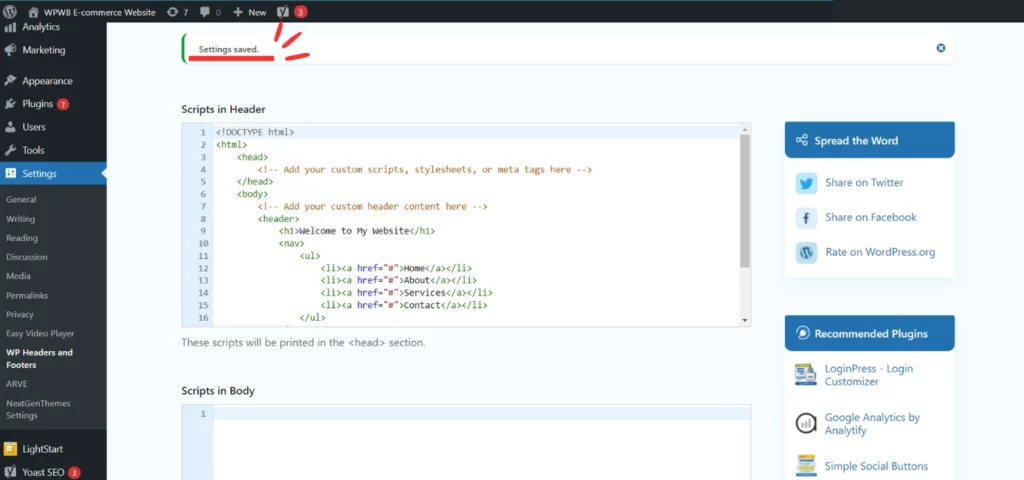
Step 2 – Select ‘WP Headers and Footers’ from under ‘Settings’ in the Admin Panel of your Dashboard. You will see an option to add Scripts in your Header and Footer. Here you can add any code or scripts to those sections, be it custom CSS, HTML, Google AdSense or Analytics code and more.
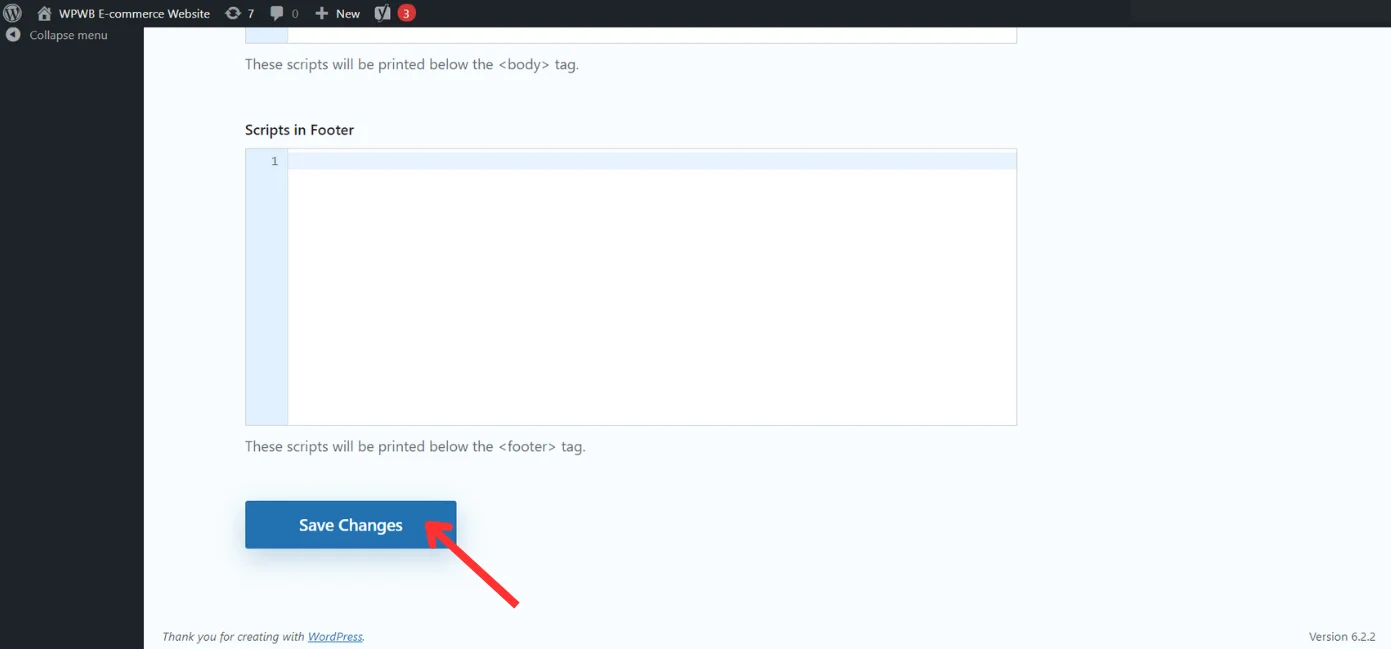
Step 3 – Enter your code in the given sections and click on ‘Save Changes’. And that’s it! The changes will be reflected on your website!
The Rundown on Editing the Header & Footer in WordPress
This article provides a detailed guide on how to edit the header and footer sections of your WordPress website. Together, we explored different methods and techniques for making those changes.
Through this guide, you gain the knowledge and tools to edit and enhance your website’s header and footer sections, giving you a chance to create a personalized appearance for your audience! A lot of times, the editability, functionality and overall look of the Header and Footer on a Website depend on the theme you’ve chosen. Here’s a read that tells you ‘How to change your Theme’ so that the design of your website is in your hands!
If you want to know more about WordPress, do check out our ‘How to’ articles. So what are you waiting for? Let’s begin Editing!
Your Top Inquiries on Customizing Header & Footer in WordPress…
The easiest way to edit your WordPress footer is through the Theme Customizer. Simply go to Appearance > Customize and find the footer section. If not, you can edit the ‘footer.php’ file directly in your theme or use Plugins. Be sure to preview any changes before publishing to avoid potential issues.
To create a custom header and footer in WordPress, use the Theme Customizer. Alternatively, your theme may have specific template files – ‘header.php’ and ‘footer.php’ that you can directly edit to customize your header and footer. You can also use Plugins or insert custom HTML and CSS into those sections on the required pages.
The best way to create a custom header and footer without a plugin, is by using your theme’s built-in Customizer Option. If not, you can directly edit your theme’s ‘header.php’ and ‘footer.php’ template files to insert custom HTML, CSS, and PHP code.


No responses / comments so far.